This week I am making new decorative pillows for my family room sectional. I have designed my pillows, picked out my fabric and coordinating trims, and have purchased my thread, zippers and pillow forms. I will be making my own welting, sewing decorative cord, and installing zippers for functional ease. Having never done this type of sewing before, I assure you it is easy as long as you have the proper tools and are willing to go slow and pay attention. Once you have tried it, you will never make a boring pillow again!
You will need a sewing machine with a zipper foot (a piping foot is ideal, but I only have a zipper foot, and it works fine), 1/2 yard of coordinating fabric for your welting in addition to the amount required to make the body of your pillow, a straight edge and marker, coordinating thread and welting cord. Welting cord is plain cream cotton, and comes in various sizes. I chose a thicker size that gave me a 1/2″ welt size. I bought my cord at Walmart, so it is very easy to find.
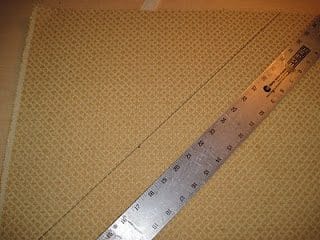
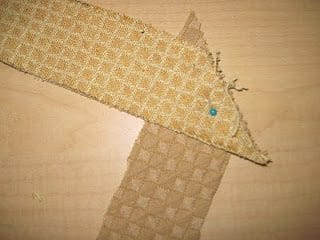
First, you will need to establish the width of fabric you will need to fold over your filler cord. You will need to add at least an inch to the width of your cord so you end up with a selvage, or flange on your welting that will be sewn in the seam of your pillow. I went with 2 inches. Then make lines at a 45 degree angle 2 inches apart on your fabric. Cut your fabric on these lines, creating strips. It is very important that you cut your fabric at this angle, also known as the “bias”, as it allows the welt to stretch and bend around the corners of your piece.
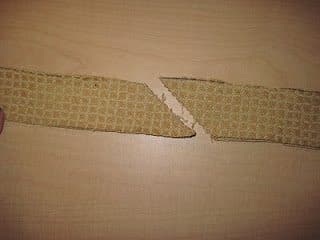
Once your fabric is in strips, begin piecing them together. Line up each section as shown above. This step can get confusing and feels weird at first. Don’t be afraid to make a mistake and then rip it out and try again!
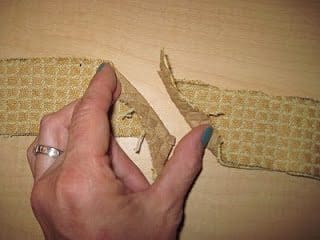
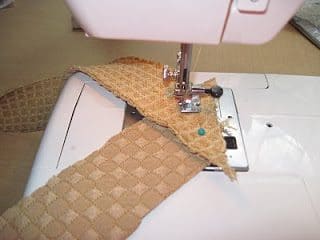
It is helpful to press back your seam allowances here so you can see how to sew the pieces together. Pin your two strips together at the bottom of the folds, where you will be stitching. When you get the two strips laying flat, they should look like this. You will be stitching where the pin is placed. Again, this is the most confusing part of the whole process, but you will get the hang of it!
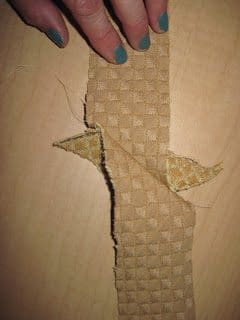
After you have stitched the two strips together, you should see a seam like this. See how imperfect my edges look? It is ok! As long as you have enough width to fold over that fill and leave a selvage so it will hold in the seam of the pillow, you are good to go. Continue to sew your strips together until you have enough length to match the length of your filler cord.
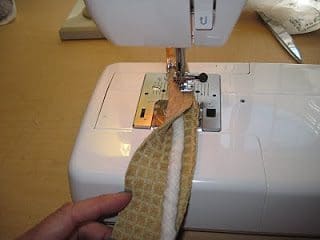
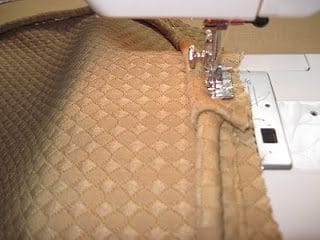
Now you are ready to make this look like welting! Install the zipper foot on your machine (or piping foot if you have one!) Fold your fabric strip over the top of your filler cord and start sewing in a straight line down right next to it. It is very important that you get a tight fight, and sew as close to the cord as possible. You do not want your cord to shift, and you want to give yourself as much of a selvage as possible to work with.
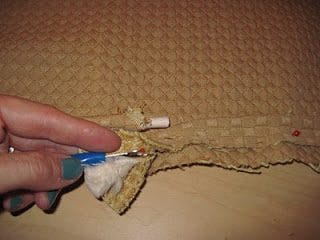
Once you have your welting finished, you can pin it onto the right side of your pillow fabric (I will show you how to do this in more detail on my next post about sewing on cording… the same technique applies). One thing that is unique to welting, however, is how you join the two loose ends together once you have pinned it all the way around your pillow. Once your cord meets up, allow for a bit of overlap, and then take a seam ripper and open up the seam on one side of your welting.
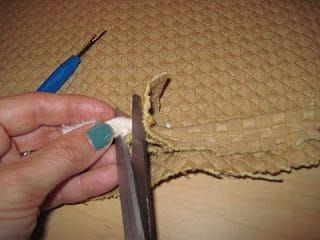
Then you will snip the filler cord at the place where it matches the fill cord on the other side. You don’t want it to have a gap, but you don’t want the cord to overlap and be bulky either, so try to be as precise as you can.
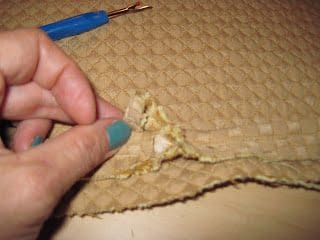
Now you will fold back about 1/2 inch of the welting fabric and wrap it around the other side of the welt, creating a sleeve. Sew as close to this join as possible. It is bulky here, so go slow and manually turn your machine if you need to. It will take a bit to get used to sewing through so many layers of materials!
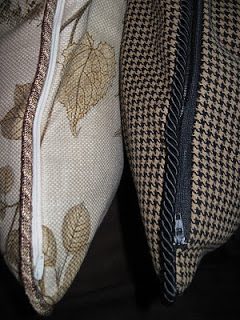
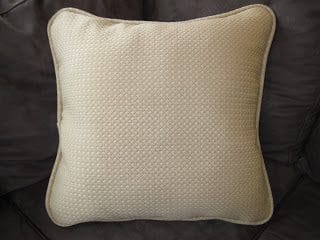
I will show you how to install the zipper in another post, but once you get all of your components of the pillow together, look how great it looks! This is a custom item that can’t be found anywhere but my living room! I encourage you to think about welting as an option to customize your future sewing projects too!

 “Piazza Navona: Il Fascino di Roma” oil on canvas by Erin Fickert-Rowland copyright 2010
 “Flight” oil on canvas by Erin Fickert-Rowland copyright 2010
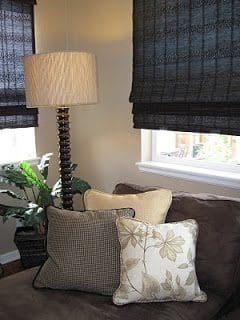
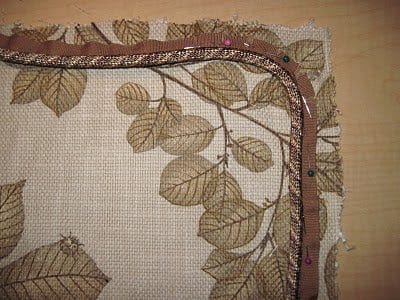 This is a simple way to join your cording at the bottom of your pillow piece. Simply leave a “tail” on each side and overlap the two ends of cord. This will be thick to sew through, but if you go slow and help manually roll the machine, this method leaves a clean finish.
 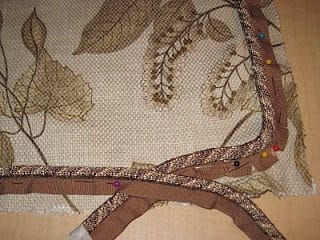 Install the zipper foot on your machine, and begin sewing around your cord as close as you can to the edge of the cord itself. I like to start with the point where the two ends meet.
 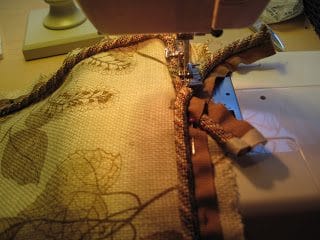 Now we are ready for the zipper! Begin by marking the center and 2″ from each end on both sides of the zipper. This will help make sure everything is lined up.
 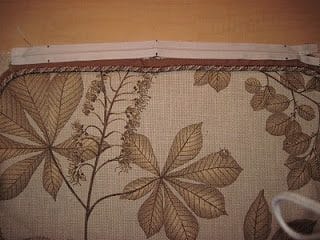 You are going to pin the right side of your zipper to the right side of the fabric, and make sure it lines up snugly, as you don’t want to see a lot of zipper cloth or trim selvage when you are finished. This is strange the first time you do it, but just go for it! The cloth around the zipper is very tough, and will withstand a few un-stitchings!
 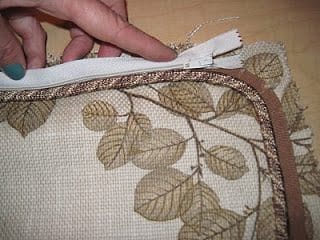 Now unzip your zipper, and begin sewing as close as you can to the zipper teeth without hitting them! Your zipper wont work if you have thread in it, and you risk breaking your machine needle (which results in a very annoying trip to the store if you don’t have back-ups!)
 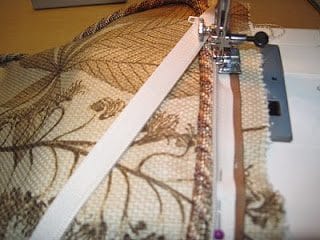 Congratulations! You are halfway there!! Zip up the zipper, and pin the right sides of your pillow pieces together.
 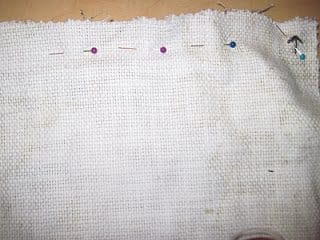 Next, pin the other side of your zipper to its corresponding side of the fabric as shown in the photo.
 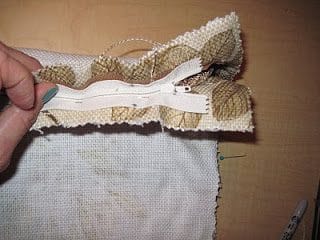 Leave the zipper pinned, but unpin your pillow pieces and unzip the zipper. Sew the other side of the zipper to its side of the fabric.
 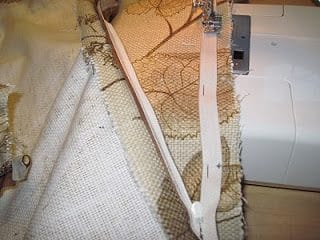 You did it! Now zip it together until 4″ or so are left open, so you can turn the pillow right-side out when finished. Pin the two right sides of your pillow together, sew from one zipper stop (the little metal bits at the end of the zipper teeth, around the open sides of the pillow to the other zipper stop. Open your zipper the rest of the way, turn your pillow right side out, and stuff it with your insert!