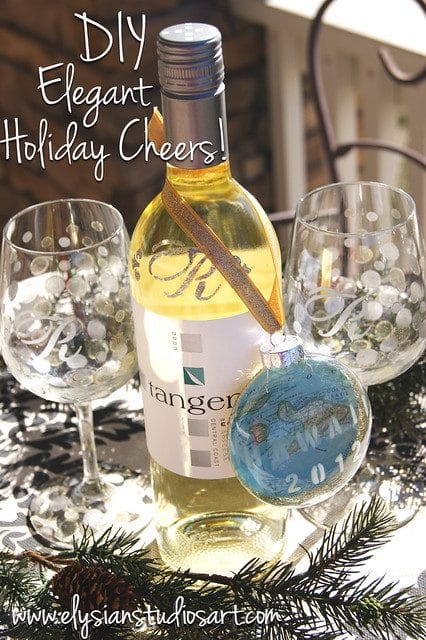
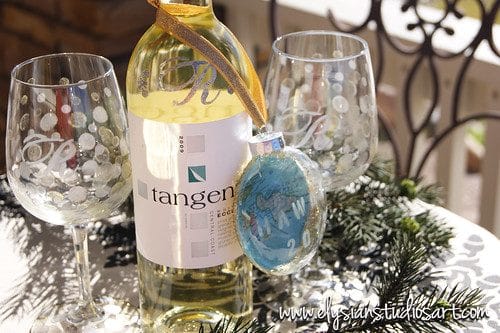
Create a gorgeous gift perfect for a hostess, friends, neighbors or family this Holiday Season.
Topped with a special ornament, a monogrammed
bottle of wine and a set of painted glasses
is certain to elicit quite a few toasts!
I shared my excitement about this project in last week’s post, where you saw the great variety of products Plaid offers in the Martha Stewart Paints Collection. I spent hours testing and playing with the products Plaid sent, and have created this beautiful, simple DIY that uses the Martha Stewart Paint products. I was very impressed with the quality of the materials and the results I achieved with them. You will love working with them too!
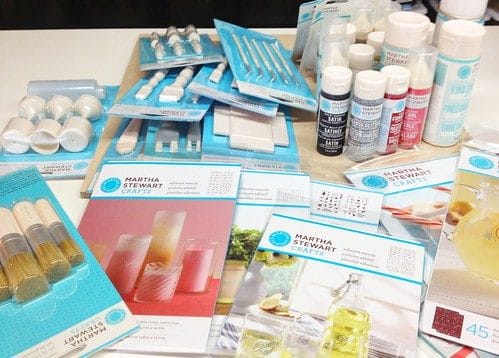
For the DIY Cheers! project
you will need the following supplies:
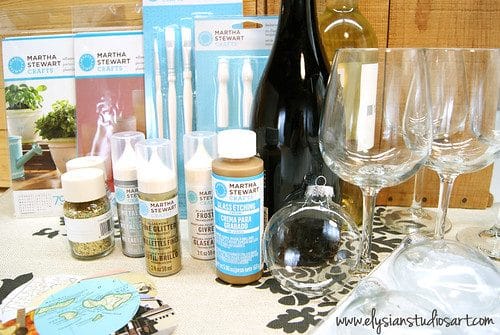
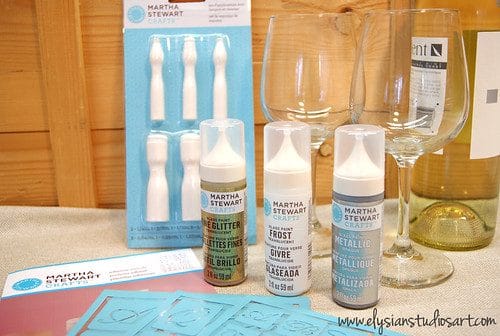
Shown clockwise left to right:
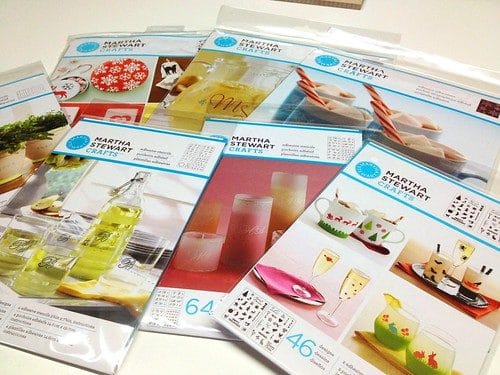
Martha Stewart Adhesive Stencils:
“Condensed Alphabet” and “Fancy Alphabet”
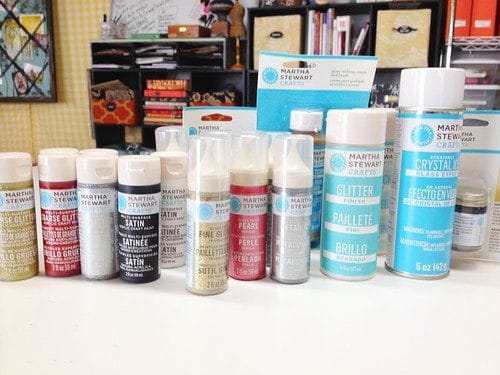
Glitter in Silver and Gold
Martha Stewart Glass Paint in your choice of colors
(I used Opaque Metallic in “Antique Pewter” and
Fine Glitter Translucent in “Florentine Gold,
Frost Translucent in “Wedding Cake” is also
pictured and will give nice results)
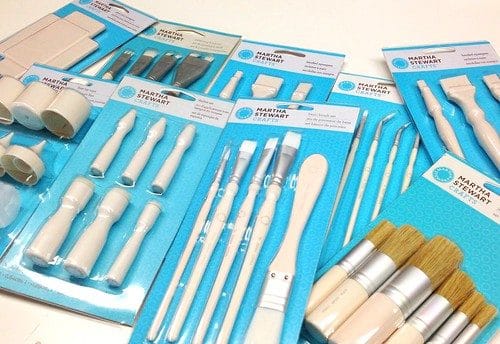
Martha Stewart Basic Brush Set and Dauber Set
Martha Stewart Glass Etching Cream
Bottles of Wine and Blank Wine Glasses
Blank Glass Ornaments
Images of your choice cut to fit the size of the ornament
(see notes about images later in the post)
Additional supplies, not pictured:
Rubbing Alcohol to clean glass
Mod Podge
Ribbon
Scissors
Paper Plates to hold paint and catch glitter
Water and Paper Towels/Baby Wipes for cleanup
**Almost all of these supplies are available at
Michael’s Arts and Crafts Stores (Well, not the wine!)**
Step One: Let’s Etch Glass!
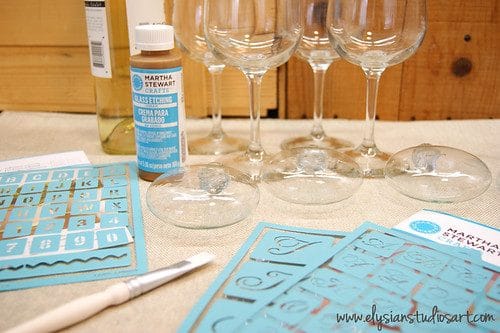
Gather your etching supplies: adhesive stencils, etching cream, a flat brush, the rubbing alcohol, and the glass items to be etched.
Let me start by saying, I have never etched glass. I didn’t know how, and I felt intimidated by the process. This was EASY, and the results were stunning! It cures in a short amount of time, and I had few, if any, problems with the product. I love the beautiful translucency of the etched image, and how the texture of the glass stays smooth after etching. I will now be etching a LOT of glass at my house!
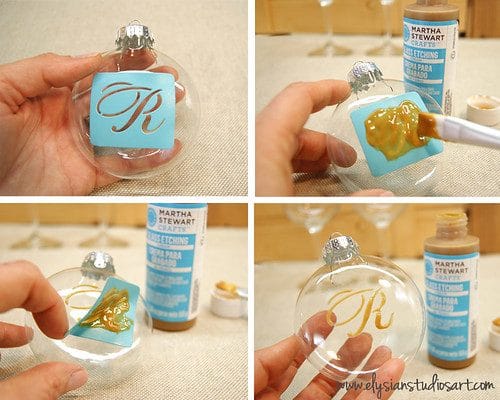
Prepare your glass by cleaning it with rubbing alcohol. Peel off the adhesive stencil you need from the sheet. A large script letter for an initial is a great place to start. I really loved these adhesive stencils! They are available in great fonts, and are re-positionable and reusable. They provide a nice, clean sealed edge for professional results, and worked great on curved surfaces.
Once your stencil is in place, paint a thick layer of the etching cream over it. Peel back the stencil, and let the etching cream cure for 15 minutes.
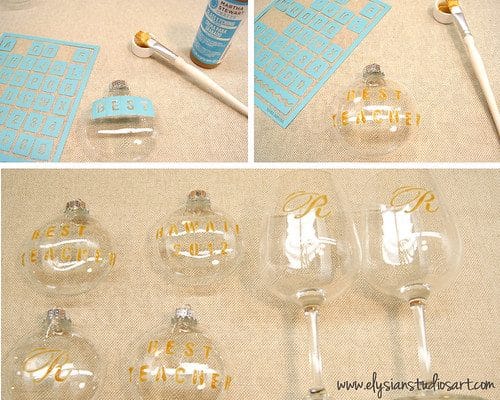
Another great thing about the adhesive stencils, is that you can arrange entire words. For example, I made a few “Best Teacher” ornaments, and one to commemorate my in-laws trip to Hawaii this year.
Once the etching cream has cured, simply rinse it off under running water, and clean your brush out with soap and water. I was really impressed at how well the etching cream came out of the brush. It wasn’t sticky or gooey. In truth, I am pretty obsessed with the incredibly comfortable handle and great bristles on these brushes, so I will take great care of them because I want them to last!
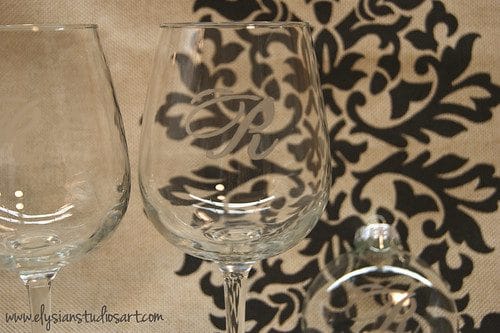
Once all the etching cream is gone, you have a beautiful, smooth piece of customized glass!
Step Two: Let’s Paint Glass!
Gather your glass painting supplies: glass paint, adhesive stencils, the dauber set, and unpainted glasses and wine bottle.
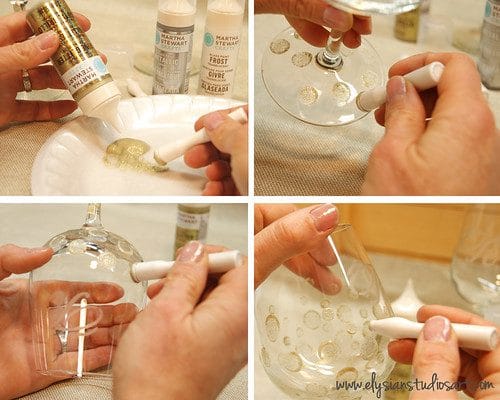
Again, prepare the glass surface by cleaning it with rubbing alcohol. Pour a small amount of glass paint onto a paper plate, and dab the medium dauber into the paint. Beginning at the base of the glass, start making polka dots by simply pressing the dauber onto the glass and lifting straight up. Re-load the dauber with fresh paint after each dot.
Work your way around the base, add a few dots to the stem, and then up onto the bowl of the glass. With the smallest dauber, add smaller polka dots toward the top. Think effervescent bubbles!
Keep the paint away from where someone will place their mouth, as the paint is not food-friendly. It is perfectly safe for the outside of the wineglass, however! The glass paint also needs to air cure for 21 days, or you can bake it in your oven (directions here).

To paint the wine bottle, clean the glass, and choose a large script initial stencil. Position the stencil where you would like on the bottle. Pour a small amount of glass paint onto the paper plate and use a dauber to paint in the stencil. Peel it off. I also used a flourish stencil, which came with the set, to add a little embellishment around the initial. Repeat the same process with these stencils, simply wiping off the paint with water and a baby wipe(which won’t stick to the stencil) to reuse it.
Note: You do not need to worry about the paint curing on the wine bottle. It will be thoroughly dry to touch, and won’t need to go through a dishwasher.
Step Three: Let’s Customize the Ornament!
Gather the ornament supplies: a flat brush, Mod Podge, etched glass ornaments, pictures, glitter, and scissors.
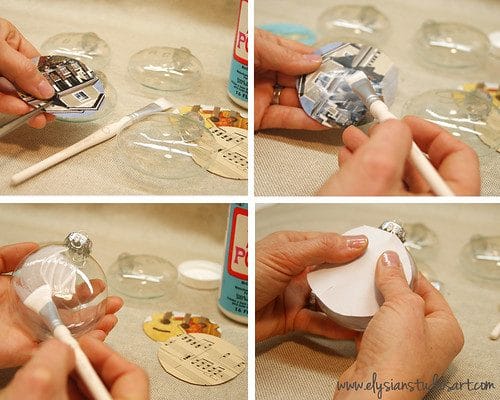
The images for your ornaments need to be color/xerox copies, laser printed images, or images from books and magazines. Do not use something printed from your ink jet printer, as the image will bleed. I used old sheet music, maps, photos from magazines, copies of my children’s artwork and family photos. Get creative and pick something that is special to the recipient!
Once your images have been trimmed to size (I just made a template from tracing around one of the ornaments), you will need to make small snips around the edges of the circle. This will help the image fit to the curve of the ornament. With your brush, apply Mod Podge to the front of your image, and to the back, un-etched, side of your ornament. Gently smooth the paper down over the ornament. Flip over the ornament occasionally to see how it looks, and try to smooth out air bubbles and wrinkles.
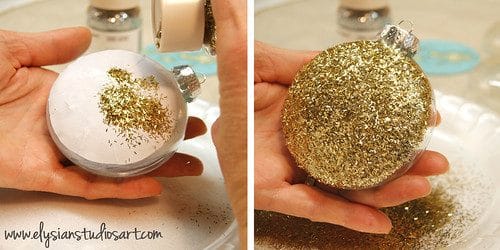
Once your image is in place, apply a liberal coat of Mod Podge over the back of the image. Be sure to go over the edge a bit, because you want to see some glitter from the sides. Sprinkle glitter onto the wet Mod Podge, over a paper plate, and then place to the side to dry for several hours (or more!). I later sprayed a little clear varnish over the glitter to keep it from falling off too much. Ahhh…. glitter… what are the Holidays without it?
There are endless possibilities for what you can celebrate with these ornaments! They are perfect for neighbors, teachers, new parents, grandparents, newlyweds (and your own tree too, of course!)
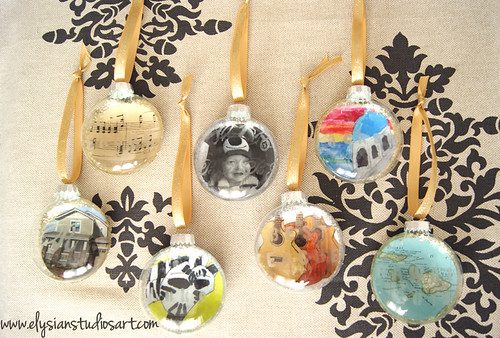
Once you have finished your ornaments, simply tie a pretty ribbon through the top, and place around your wine bottle. You have a gorgeous, elegant gift that will be appreciated this Holiday Season!
Cheers!

For more great products and project ideas, be sure to follow Plaid:
See more wonderful Holiday Projects created with Martha Stewart Paints:
Disclosure: I wrote this post as part of a paid campaign with Plaid Enterprises and The Blueprint Social. The opinions in this post are my own.