Ribbon and Ruffles: A Story of Three Pillows, part 1 | Elysian Studios
Ribbon and Ruffles: A Story of Three Pillows, part 1
Categories: decorative pillows, sewing, textiles, tutorial
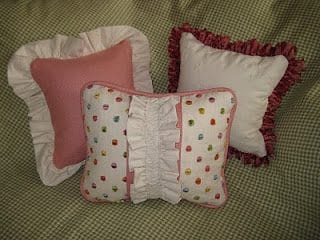 Pillows add a special touch to any room, and I recently made these three for a baby shower to celebrate my cousin’s new baby girl. They are 8 inch square pillows, so they come together quickly and are a sweet size for a little girl to tote around her room! If you have ever wanted to experiment with new details like ribbon trim or ruffles, this is a great project to start with since it requires such little material. When decorating, using three of an element looks very put together, especially if they coordinate. I first sketched my designs for the pillows, and picked my materials, ensuring I have a group of pillows that look harmonious.
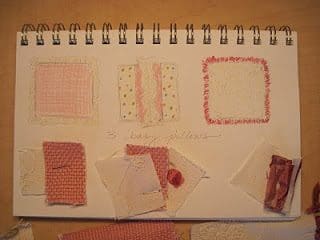
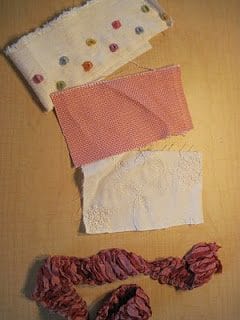
To make a pillow with ribbon fringe trim is quite simple. First, cut out two squares of fabric, each two inches bigger than your finished size (here I cut two 10 inch pieces to allow for 1 inch seams). Pin your decorative trim on the right side of the fabric 3/4 inch away from the edges.
 Sew your trim in place, paying attention to the stitch lines on the trim itself, making sure you sew on top of them.
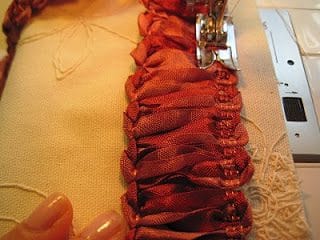
If installing a zipper, please see my other tutorial on zippers. With right sides together, pin the two squares, leaving the zipper side open. 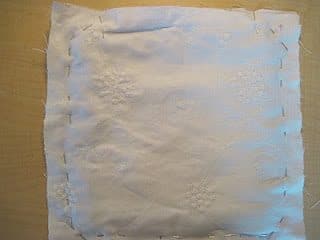 In preparation to sew, peek at your trim sandwiched between the fabric layers, to ensure it is laying correctly. Doing this also helps remind you where the stitch lines of the trim are, as you want to make sure these are sewn into the seam and not visible on the final product. Sew the two sides together.
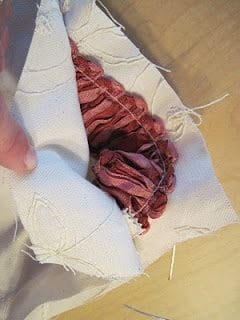
 Once completed, turn your pillow right-side out, and snip the filament on the outside edge of the trim to release the fringe.
 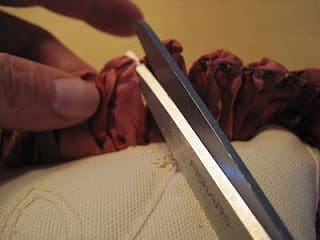 Stuff the pillow and fluff the fringe as needed!
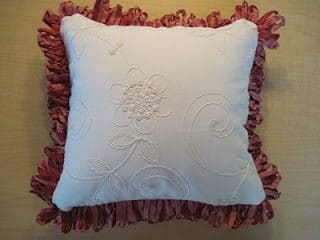
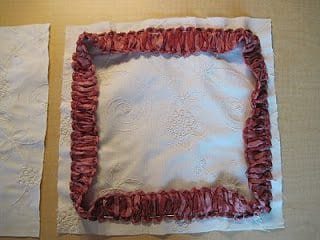
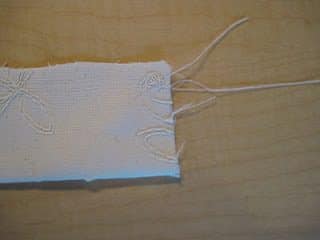
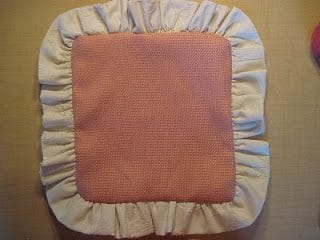
The second pillow involves making a custom ruffled fringe. This is quite simple, and an easy way to coordinate your pillows. I used the same fabric for my ruffles as I used for the body of the previous pillow. Follow the same method of construction as outlined in my other pillow projects, as I am just going to focus on creating the ruffle trim itself. Start by establishing what width you would like for your ruffle. Since my pillow is 8 inches, I chose to make a 2 inch ruffle. Therefore, I cut straight strips of fabric 5 inches wide. These will be folded in half to be 2.5 inches wide (2 inch ruffle with a 1/2 inch seam allowance). Seam strips together if more length is needed (don’t forget that it will get shorter when you gather your strip to create the ruffle!) Trim strips as needed to get a consistent width. 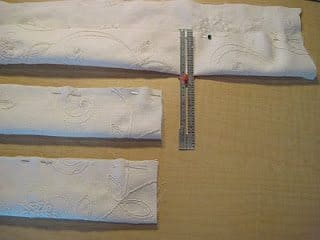 The easiest way I found to gather your ruffle is to pull a piece of thread from your spool that is a few inches longer than your fabric strip and then sew a loose zigzag stitch on top of it. Do this according to the seam allowance you accounted for, so I stitched mine 1/2 inch from the edge.
 Now you will start to GENTLY pull the long straight thread to gather your ruffle to the fullness you desire.
 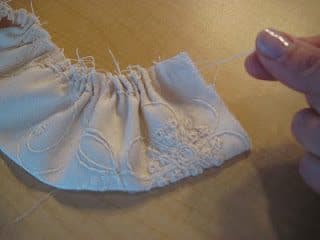 Pin your ruffle trim on the right side of one of your fabric squares in the same manner described for the ribbon trim above.
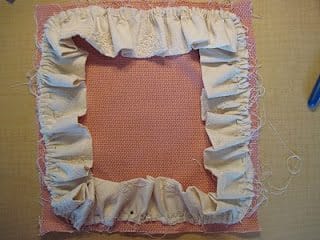
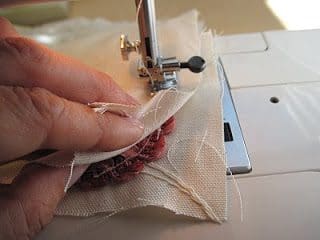
Sew your ruffle onto the pillow fabric, carefully guiding the gathers so they are permanently stitched in place. 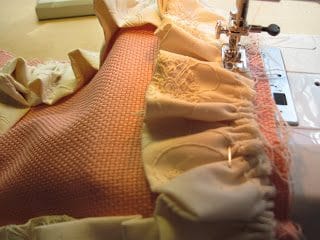
Follow the same steps I have outlined in my other pillow projects to insert a zipper and sew the right sides of your pillow together. Stuff the pillow and enjoy! 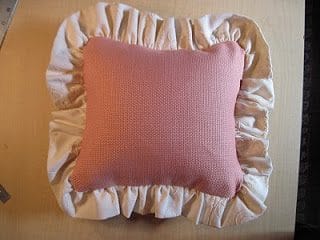
Tweet

 The town of Golden is located west of Denver, just north of I-70. Established during the Gold Rush, Golden has tons of history, including the Coors Brewery, The Capital Grill (which is the building that housed Colorado’s first state capital, before it moved to Denver), and Colorado School of Mines. Golden is full of character with no shortage of fun activities, including their annual Arts Festival.
 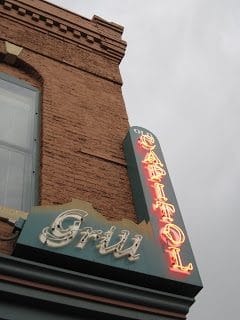 Whatever you do in Golden, you must stop off for $1.25 Coors Draft Happy Hour at the Capital Grill. If you’re lucky, you can sit on the patio on a Friday evening and watch vintage cars cruise the main streets- a hit with adults and kids!