Today I am demonstrating how to combine both cording and zippers to complete a pillow ensemble.

Zippers, buttons and snaps all add function to sewn goods, and can be intimidating to apply. However, it is critical that you think about how you will use your sewn piece- time invested in creation should be rewarded with longevity of use! The welting and decorative trim has made the pillows beautiful, and now zippers will make them functional. If you need to wash your pillow covers or change their inserts, simply unzip! No seam ripping or deconstruction involved! First, lets look at how to apply decorative cord. I have cut the body pieces for my pillow to allow for 1″ seams. I am making an 18″ square pillow, so my fabric squares are 20″x20″. When pinning your cording, measure in 1″(or whatever seam allowance you have figured) from the edge of your material to the base of the cord and pin on the right side of the fabric. The visible part of your trim should be on the inside, with the material that will go in the seam toward the edge of your fabric. 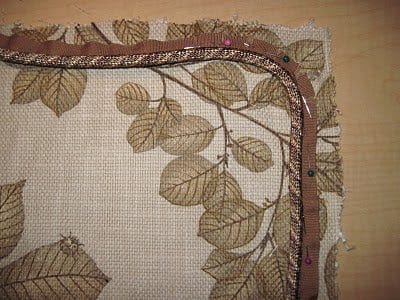 This is a simple way to join your cording at the bottom of your pillow piece. Simply leave a “tail” on each side and overlap the two ends of cord. This will be thick to sew through, but if you go slow and help manually roll the machine, this method leaves a clean finish.
 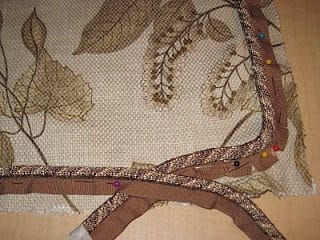 Install the zipper foot on your machine, and begin sewing around your cord as close as you can to the edge of the cord itself. I like to start with the point where the two ends meet.
 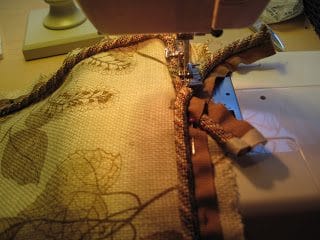 Now we are ready for the zipper! Begin by marking the center and 2″ from each end on both sides of the zipper. This will help make sure everything is lined up.
 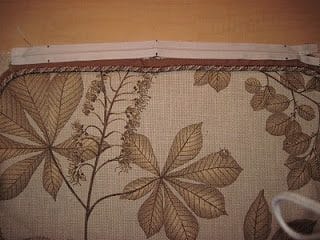 You are going to pin the right side of your zipper to the right side of the fabric, and make sure it lines up snugly, as you don’t want to see a lot of zipper cloth or trim selvage when you are finished. This is strange the first time you do it, but just go for it! The cloth around the zipper is very tough, and will withstand a few un-stitchings!
 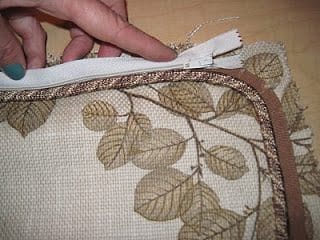 Now unzip your zipper, and begin sewing as close as you can to the zipper teeth without hitting them! Your zipper wont work if you have thread in it, and you risk breaking your machine needle (which results in a very annoying trip to the store if you don’t have back-ups!)
 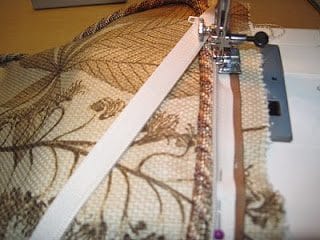 Congratulations! You are halfway there!! Zip up the zipper, and pin the right sides of your pillow pieces together.
  Next, pin the other side of your zipper to its corresponding side of the fabric as shown in the photo.
 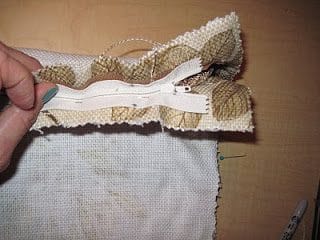 Leave the zipper pinned, but unpin your pillow pieces and unzip the zipper. Sew the other side of the zipper to its side of the fabric.
 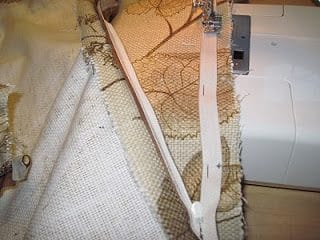 You did it! Now zip it together until 4″ or so are left open, so you can turn the pillow right-side out when finished. Pin the two right sides of your pillow together, sew from one zipper stop (the little metal bits at the end of the zipper teeth, around the open sides of the pillow to the other zipper stop. Open your zipper the rest of the way, turn your pillow right side out, and stuff it with your insert!
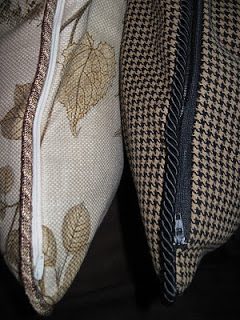
Tweet