Studio Series: Setting up a Jewelry Studio | Elysian Studios
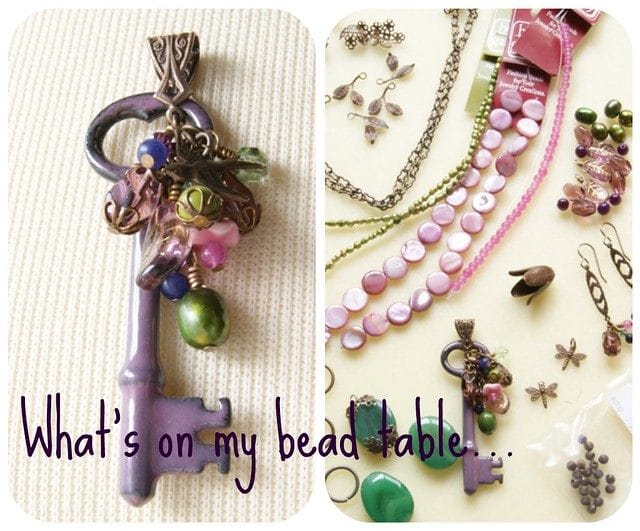
It’s Bead Table Wednesday! I’ve received my first online bead order from BelloModo, which was full of Vintaj goodness! This key was on my table a few weeks ago, but I’ve been in the middle of a studio move and re-organization,so it’s been delayed. I’ve finished my focal, and look forward to stringing/linking my new components into a complete piece! Inspired by Monet, this set will feature purples, greens and pinks with botanical and nature-themed accents.
How is your studio set up?
Do you have a dedicated space for your creative work?
I am in the early stages of my business. I’ve traveled this road many years before (as in, before two children), but am finally able to commit to the long journey ahead. I’ve claimed a portion of the house as my own, and have been busily transforming a make-shift environment into a fully functional multi-media studio (that’s a tall order!)
Studios are such a site-specific endeavor! Though I’ve tried to research the best organizational methods, I’ve found everyone’s space/budget/resources to be completely unique. I encourage you to mindfully determine your own needs. Creativity occurs at the heart, no matter the space, budget or audience!
If you are serious about a jewelry business, then no matter what, organize those beads!
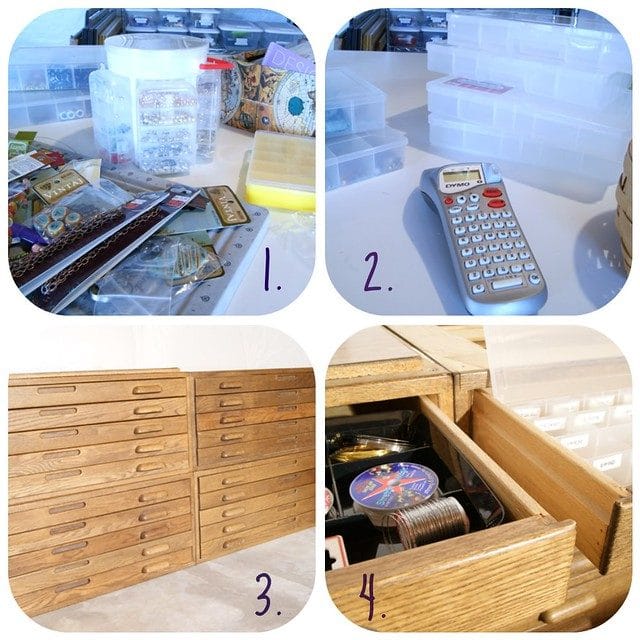
1.) You’re not alone! Look at my mess! For too long I’ve been stashing my bead finds in a mish-mash of varied containers. Consistency and uniformity are key to a successful organizational system.
2.) Enter the label-maker and simple containers. I’ve separated my beads by vendor, color an function. This way I can easily pull the pieces I need, reference what I have used and clean-up will be easy!
3.) I (luckily) salvaged some flat files from a down-sized company. These are essential for the fine-art component of my business, but are also helpful for beads! You could also stack your bead organizers on shelves or in a re-purposed dresser.
4.) I also utilized black desk-drawer organizers for threading elements, and labeled compartments of my bead organizers for specific components. With meticulous labeling, I can easily access a specific tool, as well as reference a component in my beading resources.
Once you make that gorgeous jewelry, you have to photograph it!
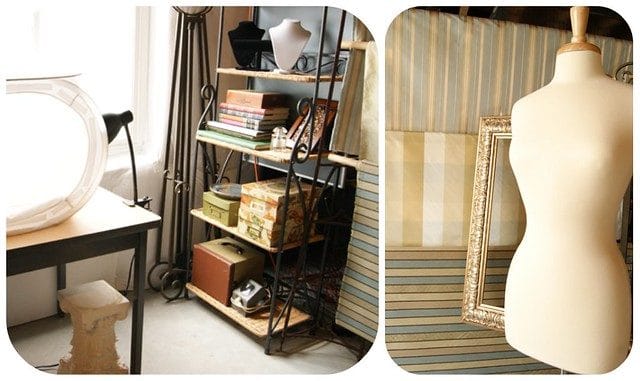
Another important component of a successful beading studio is an area specifically designated to photography. Focusing on available sunlight, I have set up a table, prop shelf, and mannequin near a window in the studio. Even if you don’t have an area you can permanently dedicate to photography, find a place with a table near a window and keep a plastic tub full of your props close by.
A light tent, with additional lamps, is an essential tool for photography when light is not ideal in the studio (night, cloudy day, etc.) Props: busts, books, vases, glassware, etc. are also crucial for adding interest to your jewelry photos. Personally, I feel a life-sized mannequin is a necessity for building your jewelry pieces, as well as communicating their scale.
This is the first of a series of studio organizational tips.
Are you having difficulties organizing your creative space? Do you have advice to share with other artisans?
Let’s talk!
