
Plein Air Painting: Day 1- Preparation | Elysian Studios
Plein Air Painting: Day 1- Preparation
Categories: drawing, Elysian Studios, En Plein Air, painting, Rocky Mountains, tutorial
I have painted “En Plein Air” before, but I have been primarily a studio painter, focusing on abstract images and the occasional still life. Because I am surrounded by such a stunning and dynamic landscape in Colorado, I am committed to returning to nature to better understand light and shadow, color, and structure of natural elements. As an abstract painter, it is critical to be able to communicate these ideas to your viewer even if your imagery is inspired by your imagination. The other benefits of getting out of the studio, are refining your equipment, gaining precision and accuracy of paint application, and developing reliable reference materials. I am going to attempt three small paintings in locations near my house. For better or worse, I will share my process and hope it is successful!
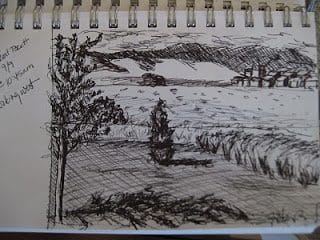
First, I found convenient locations,chose my compositions, and sketched them in pen and ink in my sketchbook. It is surprisingly overwhelming to be outside and translate all of that natural information into one little sketch! My focus on each sketch was speed and value. I documented the time and place of my sketch, so I can try to get back to that site to paint at the same time, and then snapped a photo for reference.
Location #1:
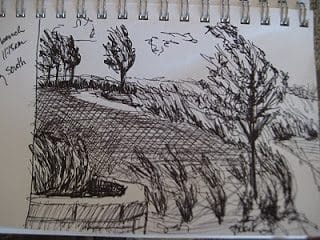
 Location #2:
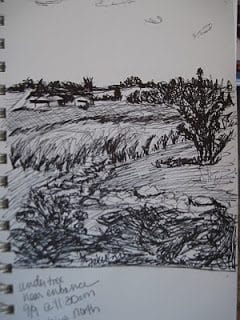
 Location #3:
 I have compared my sketches to my reference photos and printed out copies of them to take with me. Next step: Pack my equipment and return to paint! Tweet
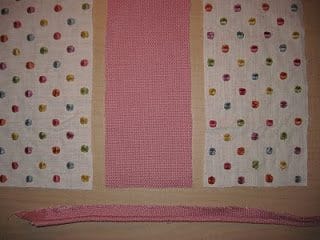 Pin center panel to the side panels and stitch using a straight stitch on your machine. Press open the seams to ensure the panels lay flat for the completed pillow.
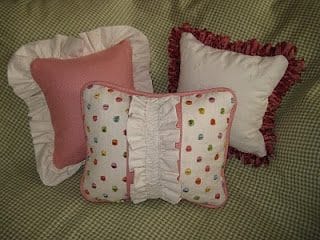
 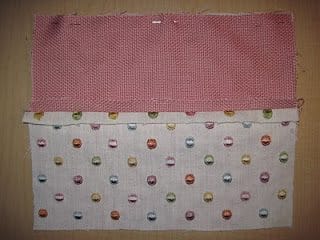 I made two identical sides, one for the front, to which I applied a ruffle, and one for the back, which I left plain.
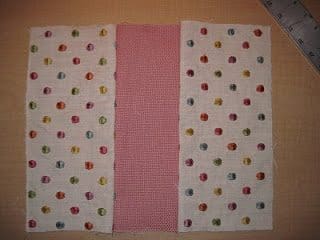
 Stitch down both sides of the center panel so it will lie flat.
 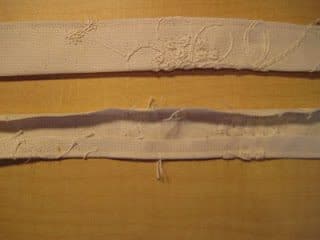 The center panel is then gathered in the same manner as the side ruffles. Take a thread from the spool and cut it a few inches longer than the center panel. Sew a loose zigzag stitch over it, in the center of the panel (shown at the bottom). Then gently pull the straight thread and gather the panel until the desired fullness is reached (at top).
 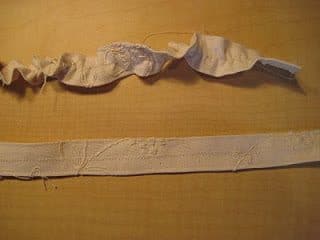 You should now have three ruffled pieces: two sides and one center. Top stitch the right side of your ruffle on the right middle of the center panel using a straight stitch on your machine. Sew the right side of the center ruffle on top of the right ruffle.
 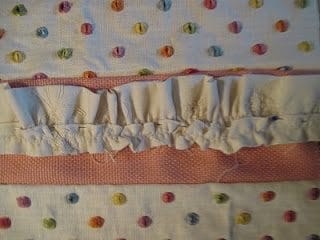 Tuck the left ruffle under the left side of the center ruffle and stitch in place. Whew! It is a complicated process and sounds confusing, but ruffles are amazingly forgiving. The difficult process will pay off with “oohs” and “aahs” when people want to touch and squeeze your pillow!
 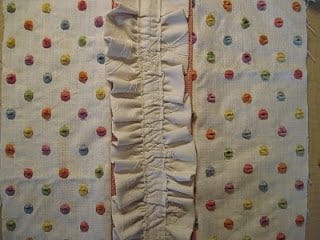 Sew your welting to the other side of the pillow. For details on how to do this, please see my previous post on applying decorative cord and use the same process. This post will also show you how to add a zipper and finish your pillow.
 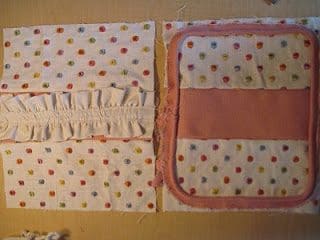 Once you have the pillow sewn together, turn it right side out and stuff with your insert. Enjoy or give a handmade gift made with love to someone special!
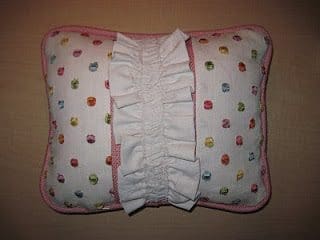 Tweet
Tweet