


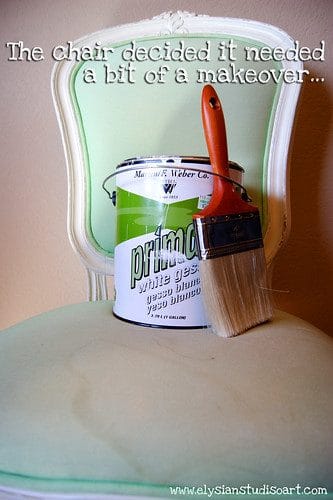
I was going about my normal morning routine recently, when I spied this cute (though well-used) chair on a curb next to a trash bin (Gasp!). Of course the little thing had to come home with me straight away. I didn’t know exactly what I’d do with it, but I knew I’d figure out something.
Upon closer inspection, I realized there was just some surface stains on the cushion fabric, but overall, this chair was in great condition! Since it has welting and fabric on the back of the chair, I knew that re-upholstery would be too costly and time-consuming to DIY.
But what if I could just paint the fabric?
How is it really much different than a canvas?
So that’s what I did!
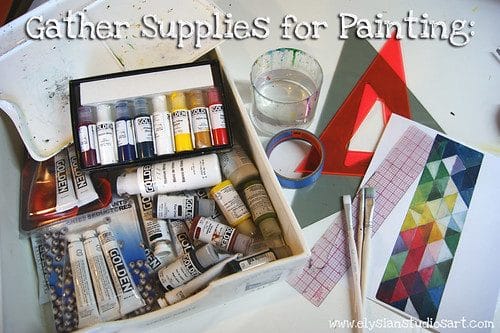
For a similar project, you will need:
Gesso or primer
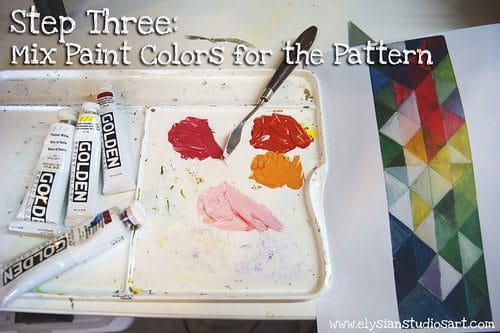
Acrylic paints (I used artist paints, but high-quality craft paints would be fine too)
Latex Paint in your choice of color (ex: tester size of Behr paint- $3 from Home Depot)
Clear Polyurethane Varnish
Paintbrushes in a variety of sizes
Pattern/Design to paint on fabric
Ruler and tools for transferring/drawing pattern
Palette for paints
Paper towels and water for clean up
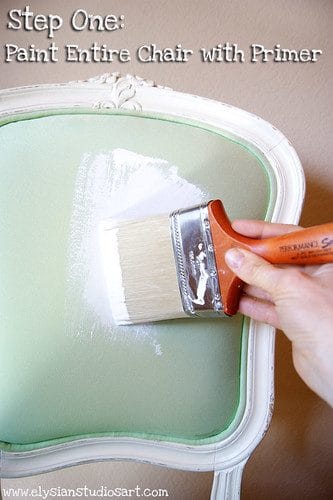

The gesso or primer (Kilz brand is good) will seal off the fabric, preventing the stains from bleeding up through the new paint. It also creates a bright white “toothy” surface for the new paint to adhere to. Cover all the fabric and wood frame of the chair (it may require two coats). Then…
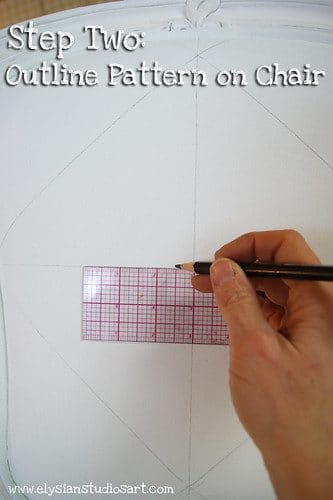
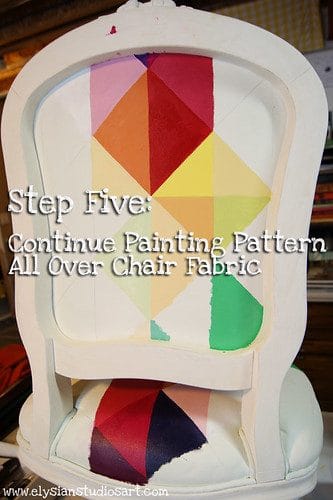
You will need to determine in advance what pattern you would like to paint on your chair. I collect pattern and graphic ideas on Pinterest (you can follow my board here). I just loved this pattern from a 1913 painting by August Macke. Measure and draw your pattern onto your chair. Be aware that the more intricate your design, and the more colors in the pattern, the more difficult this project will be!

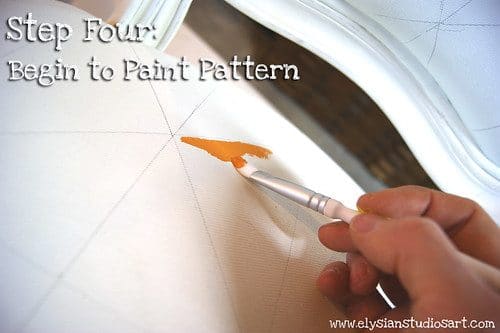

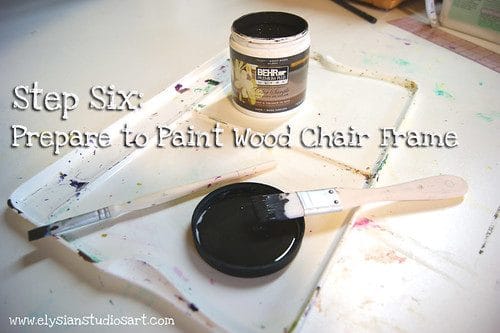
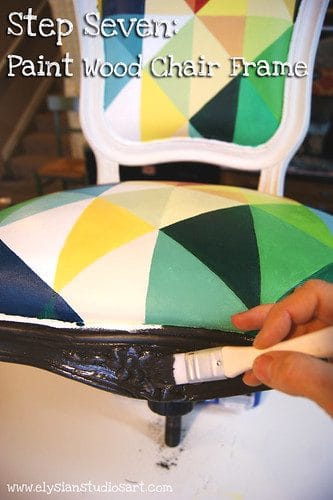
You will want a more durable latex paint for the wood. Again, I just had a custom color mixed at Home Depot. The “tester” size is only $3 and is more than enough paint for a similar project. It only comes in the “flat” finish, so you will need to seal it with clear polyurethane. The painted fabric should also be sealed to protect the painted pattern from damage. Please note, I also painted the welting with the latex paint. You will need a small brush for this.

You’ve now created a piece of functional art! Of course you have to sign it! Once you’ve added your signature, and have allowed everything to dry at least 12 hours, paint the chair with the clear polyurethane as your final step. Allow the polyurethane to dry 24 hours before using the chair.

If you see a cast-off chair, don’t hesitate to think outside of the box to reclaim it for your own decor. I completed this project only having to buy the $3 tester paint- everything else was leftover from other projects!
What is your favorite trash-to-treasure project?
I’d love to hear about it! Please let me know if you try this project or have any questions!